


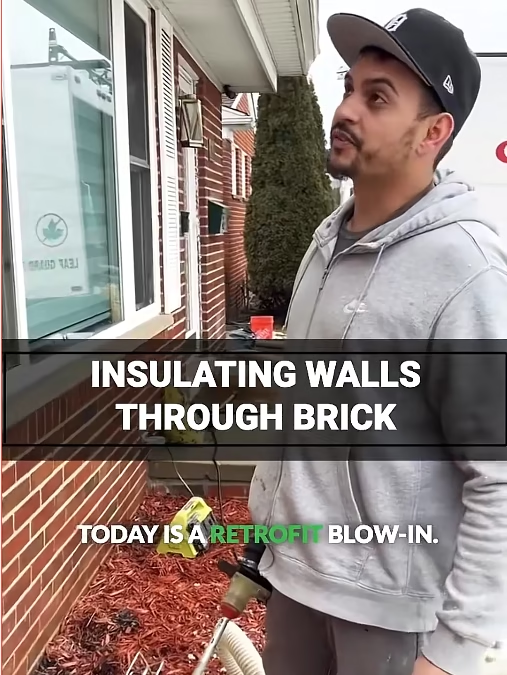
Drill and fill wall insulation in Michigan is a practical way to improve an older home’s energy efficiency without tearing apart the interior walls.
Many homeowners assume that adding insulation to existing walls means removing drywall, making a mess, and spending weeks on renovations.
Fortunately, that’s not always the case.
In this video, Miguel from Level Up Improvement demonstrates how we install blown-in cellulose insulation through the exterior brick of a home using a process called drill and fill.
The process is straightforward. We drill access holes, blow insulation into the wall cavities between the studs, and repair the openings with mortar.
Here’s how it works and what homeowners should know before considering this upgrade.
Watch Miguel Explain the Drill and Fill Insulation Process
In this project, Miguel explains how our crew accesses the wall cavities through the brick exterior.
Instead of opening up the walls inside the home, we work from the outside.
The goal is to fill previously uninsulated or underinsulated wall cavities while minimizing disruption to the home’s interior.
What Is Drill and Fill Wall Insulation?
Drill and fill is a method of adding insulation to existing enclosed walls.
Installers create small access holes and use specialized equipment to blow insulation into the spaces between wall studs.
These spaces are called stud cavities.
In many wood-framed homes, studs are spaced approximately 16 inches apart, although actual framing layouts vary.
Each cavity needs adequate insulation coverage.
For homes with brick veneer over wood framing, the insulation goes into the appropriate framed wall cavities, not the drainage space behind the brick.
This distinction is important because brick walls need to manage moisture properly.
How We Install Blown-In Insulation Through Brick
Miguel walks through the process in the video. Here’s what the work involves.
Step 1: Locate the Wall Cavities
Before drilling, we identify where the wall studs and insulation cavities are located.
On a typical wall with studs spaced 16 inches on center, we access the spaces between those studs.
Windows, doors, blocking, and other framing details can change where access holes are needed.
The objective is to reach the areas that need insulation without unnecessarily disturbing the exterior.
Step 2: Drill Access Holes Through the Exterior
Next, we drill small holes through the brick exterior to access the appropriate wall cavities.
Working through mortar joints can make the exterior repairs easier to blend into the existing masonry.
The holes must provide access to the framed wall cavities, rather than simply opening into the space behind the brick.
That allows us to install insulation without removing large sections of drywall.
Step 3: Blow Cellulose Insulation Into the Walls
Once the openings are ready, we use specialized blowing equipment to install cellulose insulation.
Cellulose is commonly manufactured using recycled paper fibers treated for fire resistance.
The material travels through a hose into the wall cavities.
Proper installation means filling the cavities at the manufacturer’s specified density.
It’s important to account for obstacles inside the wall, including framing blocks, wiring, and other obstructions.
Simply blowing material into one opening doesn’t guarantee that every part of the wall has been insulated.
Step 4: Fill the Holes With Mortar
After the insulation is installed, we repair the drilled openings with mortar.
This helps restore the appearance of the brick exterior.
The repair also needs to maintain the wall’s weather protection and moisture-management system.
Mortar color and texture can vary with the age of the home, so some repairs may remain visible.
The goal is a neat, durable repair that blends with the existing brickwork as closely as practical.
Why Add Insulation to Existing Exterior Walls?
Older Michigan homes often have less insulation than modern homes.
Some wall cavities may have little insulation or none at all.
Adding insulation can improve comfort and reduce heat transfer through the exterior walls.
A More Comfortable Home in Winter
Michigan winters can make poorly insulated walls especially noticeable.
Rooms may feel colder near exterior walls, even when the furnace is running.
Adding insulation can help reduce heat loss through those walls.
Better Comfort During Summer
Insulation doesn’t only help during winter.
It also slows heat transfer into the home during hot weather.
That can help your air conditioner maintain a more consistent indoor temperature.
Reduced Heating and Cooling Demand
When your home loses heat more slowly in winter and gains it more slowly in summer, your heating and cooling equipment may not need to work as hard.
Actual savings depend on your home’s existing insulation, air leakage, heating system, and other conditions.
No Need to Tear Out Finished Interior Walls
One of the biggest advantages of drill and fill wall insulation is that the work can often be completed from outside.
For homeowners with finished drywall, trim, and painted interiors, that can make the project much less disruptive.
Can You Add Insulation to Any Brick House?
Not necessarily.
The type of wall construction matters.
Many Michigan brick homes have a brick veneer exterior with a wood-framed wall behind it.
Other homes have solid masonry walls or different construction methods.
Drill and fill is intended for suitable enclosed wall cavities. It is not a method of simply filling every empty space behind brick.
Brick veneer assemblies often have a drainage cavity designed to manage water that gets behind the brick.
That space must remain functional.
Before installing insulation, a contractor should identify the wall assembly and check for moisture problems.
If the brick, flashing, or wall system has an existing water intrusion issue, that problem needs to be addressed first.
Will Blown-In Wall Insulation Settle Over Time?
This is a common homeowner question.
Properly installed dense-pack cellulose is designed to resist settling.
The key is achieving the correct installation density.
If insulation is installed too loosely, gaps may develop over time.
That’s why the equipment, installation method, and crew experience matter.
A good installation should also account for hidden obstructions that might prevent insulation from reaching every part of the wall.
How Much Insulation Can Fit in an Existing Wall?
That depends on the depth of the wall cavity.
A typical 2×4 framed wall has approximately 3½ inches of cavity depth.
A 2×6 wall has approximately 5½ inches.
The insulation’s thermal performance depends on the product, installed density, and available space.
The insulation’s R-value measures resistance to heat flow.
Higher R-values generally provide greater thermal resistance, but the overall performance of a wall also depends on studs, air leakage, and other components.
For more information, see ENERGY STAR’s recommended insulation R-values.
Is Drill and Fill Wall Insulation Worth It in Michigan?
For a home with empty or poorly insulated exterior wall cavities, drill and fill can be a worthwhile improvement.
Michigan experiences cold winters and warm summers, making insulation valuable throughout the year.
However, not every home needs the same upgrades.
Before recommending insulation, it’s important to understand what’s already in the walls.
If the existing cavities are adequately insulated, other improvements may offer better value.
Attic insulation, air sealing, windows, and exterior improvements can all play a role in a home’s overall comfort.
The U.S. Department of Energy’s guide to insulating existing exterior walls explains how contractors evaluate and insulate enclosed wall cavities.
Common Questions About Drill and Fill Insulation
Does drill and fill damage brick?
The process requires drilling access holes through the exterior.
When performed properly on a suitable wall, those openings can be repaired with mortar.
However, drilling and patching still require care. Older or deteriorated masonry may need additional attention.
Do you have to drill every 16 inches?
Not always.
Miguel demonstrates a process based on wall cavities spaced approximately 16 inches apart.
Actual hole placement depends on the framing layout, existing insulation, and obstructions inside the wall.
Some cavities may require more than one access point.
Will I see the holes afterward?
Mortar repairs can often blend into the surrounding brickwork, but an exact color and texture match isn’t always possible.