


How to Replace a Window Screen: A Simple DIY Guide
If you’re wondering how to replace a window screen, this is one home project that many homeowners can handle themselves. You only need a few basic tools, a little patience, and about an 30 minutes depending on the size of the screen.
I recently replaced the screen on a friend’s sliding patio door near 15 Mile and Livernois in Troy, Michigan. This one was larger than a typical window screen, but the basic process is almost exactly the same.
The old screen had ripped and started pulling apart, so instead of replacing the entire screen frame, we simply removed the damaged material and installed new screen.
If your frame is still in good shape, this can be a very approachable DIY project.
What You Need to Replace a Window Screen
You don’t need many tools for this job.
For most window or patio door screens, you’ll need:
- Replacement screen material
- A screen spline roller
- A sharp utility blade
- Replacement spline, if the old spline is damaged or brittle
You can find all of these supplies at most local hardware or home improvement stores.
A spline roller is the small tool used to press the screen and spline into the groove around the frame. It is inexpensive, and it makes this job much easier.
Step 1: Remove the Screen Frame
Start by removing the screen from the window or patio door.
For this project in Troy, I removed the sliding screen door and laid it down on a flat surface. Working flat makes the entire process easier.

Before you start pulling anything apart, take a look at the frame itself.
If the aluminum frame is badly bent, cracked, or pulling apart at the corners, replacing only the screen may not solve the problem. In that situation, you may need a new screen frame.
If the frame looks solid, you’re ready to move on.
Step 2: Find the Spline Groove
Around the edge of the screen frame, you’ll see a narrow channel or groove.
This groove holds the spline, which is the rubber cord that keeps the screen material locked into the frame.

Carefully pull the old spline out of the groove. Once the spline comes out, the old screen material should come free.
Depending on its condition, you may be able to reuse the spline. If it feels hard, cracked, stretched, or brittle, I would replace it.
The Home Depot’s screen replacement guide also recommends replacing old spline when it is no longer flexible.
Step 3: Remove the Old Screen
Once the spline is out, pull the damaged screen material away from the frame.
That’s it. The old screen can go in the trash.

Take a minute to clean any dirt or debris out of the spline groove before installing the new screen. You want the new material and spline to sit properly in the channel.
Step 4: Lay the New Screen Over the Frame
Roll the new screen material across the entire frame.
Leave a couple of inches of extra material around each side. Don’t try to cut it perfectly to size yet.
It’s much easier to install the screen first and trim the excess afterward.
Try to keep the screen reasonably straight and flat, but don’t worry about making it extremely tight at this point.
Step 5: Use the Screen Roller
Now comes the important part.
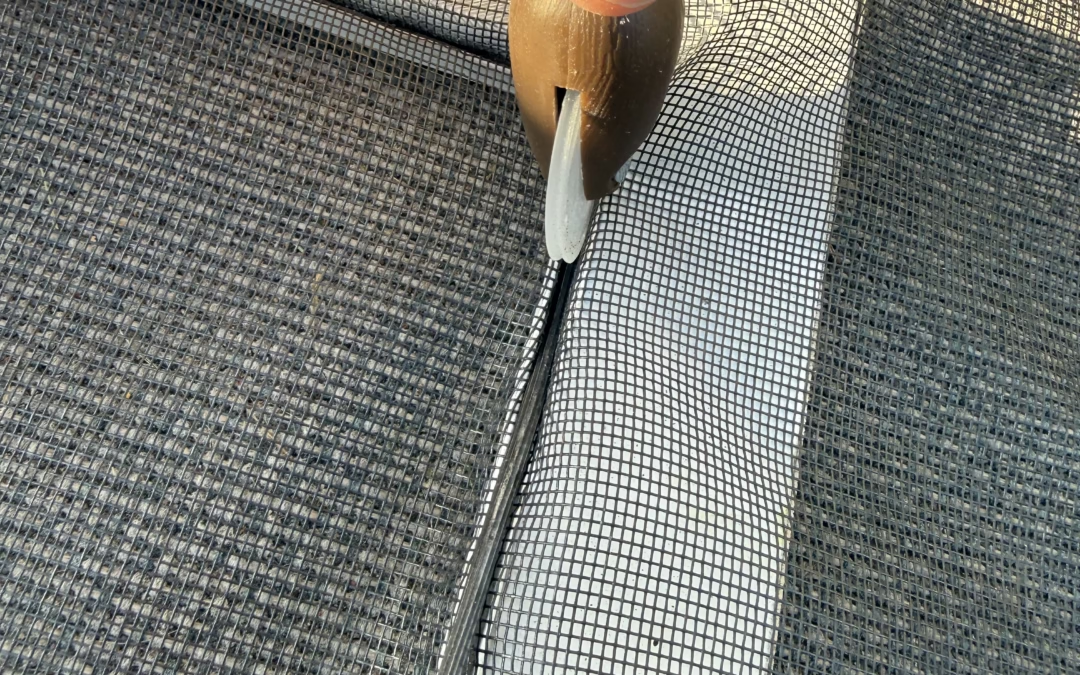
Take your screen spline roller and begin pressing the screen into the groove around the frame.

The roller has small wheels that help push the screen and spline into the channel.
Start along one side and slowly work your way around the frame.
Once you start installing the spline, it will hold the new screen in place.
How Tight Should a Window Screen Be?
You want the screen to look smooth and tight, but don’t pull it as hard as possible.
Too much tension can bow the screen frame or cause the material to pull incorrectly.
Keep the screen flat as you work around the frame and gently remove wrinkles as you go.
For a larger patio door screen like the one we repaired in Troy, having another person hold the material can make the job easier.
For a standard window screen, one person can usually handle it without much trouble.
Step 6: Roll the Spline Into the Groove
Continue using the roller to press the spline into the groove around all four sides.
Pay extra attention to the corners.
Make sure the spline sits completely inside the channel and holds the screen securely.
Take your time here. If the screen starts getting crooked or develops a large wrinkle, you can pull part of the spline back out and redo that section.
That’s one of the nice things about this project. You don’t have to get everything perfect on the first try.

Step 7: Trim the Extra Screen
Once the spline is completely installed and you’re happy with the tension, it’s time to remove the extra screen material.
Use a sharp utility blade and carefully cut along the outside edge of the spline.
Keep the blade pointed away from the finished section of screen.
You want to cut the excess material without accidentally cutting through the screen you just installed.
This is probably the step where you want to slow down the most.
Step 8: Put the Screen Back In
Once you’ve trimmed the excess material, take a look around the entire frame.
Check that:
- The screen is secure
- The spline is fully seated
- There aren’t any major wrinkles
- No extra screen material is sticking out
- The frame still sits square
Then reinstall the screen in the window or patio door.

For this Troy patio door, the new screen made a big difference without needing to replace the entire door or screen frame.
Can You Replace a Window Screen Yourself?
In many cases, yes.
If you have a good screen frame and the only problem is torn or worn screen material, replacing a window screen is a very reasonable DIY project.
You don’t need specialized power tools or much experience.
A new roll of screen, a spline roller, and a utility blade can get the job done.
The biggest thing is simply taking your time.
If something doesn’t look right, pull the spline back out and try again.
When Should You Replace the Whole Window or Screen Frame?
Replacing the screen material won’t fix every issue.
If the frame is badly bent, broken, or no longer fits properly in the window, you may need to replace the entire screen assembly.
And if you’re dealing with bigger problems such as damaged windows, drafts, broken seals, or windows that don’t operate properly, that’s a different project entirely.
Level Up Improvement installs replacement windows throughout Southeast Michigan, including Troy and the surrounding Oakland County area.
You can also learn more about the communities we work in on our service areas page or read more about Level Up Improvement and how we approach exterior home projects.
We’re always happy to help with the bigger projects, but we’re also big believers that homeowners don’t need to hire a contractor for every little thing.
Sometimes a trip to the hardware store and a little DIY work is all you need.
DIY Window Screen Repair in Troy, Michigan
This particular project was completed near 15 Mile Road and Livernois Road in Troy, Michigan, but the same process works for most traditional window screens and sliding patio door screens.
If you’ve been staring at a torn screen all summer, give it a shot.
It’s inexpensive, the tools are simple, and it’s a satisfying little project once you get the finished screen back into place.
And if your project turns into something bigger than a screen repair, Level Up Improvement provides window and exterior remodeling services throughout Troy, Oakland County, and Metro Detroit.
Do it right!